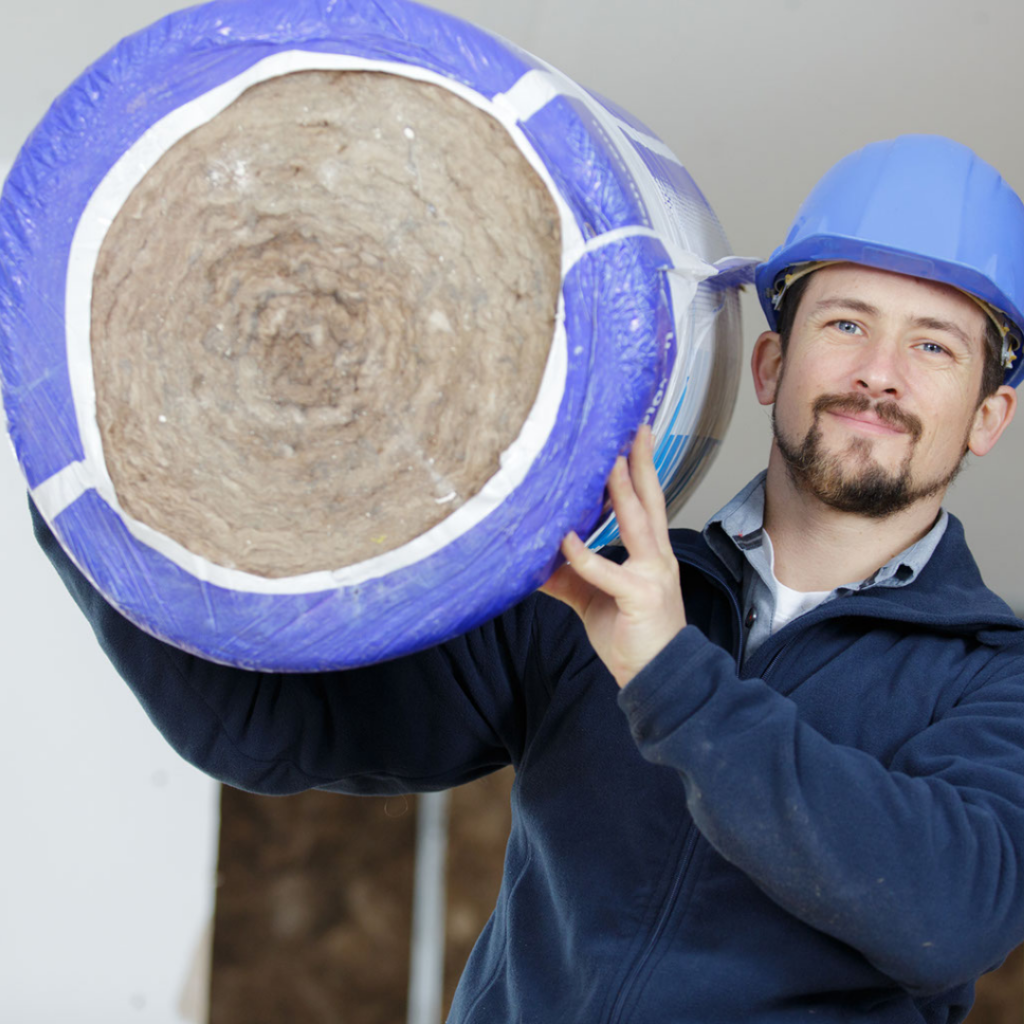
 Although durable insulation starts with expert installation, there are a few factors that can impact how effective the insulation you’ve installed is in the long term. While some of these factors are out of your control, unhappy clients will likely still turn to you to solve issues in the case of insulation not working as it should.
Failing to provide clients with adequate aftercare information or failing to spot potential hindrances to insulation’s lifespan can result in poor reviews for your business.
Likewise, you might be called to repair a poor installation job performed by another contractor. In this case, knowing what helps and hinders insulation’s effectiveness is a must.
While insulation can be incredibly durable if you get the right materials and install it with care and consideration, issues can occur if the installation goes awry or you don’t choose a high-quality product. In these situations, there are a few ways you can repair it.
Read on to find out how to fix common insulation issues, how to advise worried clients, and how to prevent issues from occurring in the first place.
Common Insulation Issues
While rare insulation issues are difficult to foresee, there are some common issues that insulation suffers from after it’s been in use for a while.
These include:
- Compression
- Cracks
- General damage or dust build-up
- Condensation, damp, or build-up of ice
- Corrosion
Some types of insulation are more prone to this than others. Cavity walls, for example, are built for ventilation purposes, so insulating a cavity wall and installing materials into the gaps does have the potential to disrupt this ventilation and cause damp and condensation.
Spray foam is a problem material for causing condensation and damp, since it’s airtight and acts as a moisture barrier, which creates inadequate ventilation for the space. As a result, spray foam isn’t currently recommended as an effective insulation material and it can cause issues with a surveyor or lender when buying or selling a house.
Homeowners should have their insulation checked at least once per year, but there are ways to tell if your insulation isn’t working successfully even without checking manually. First and foremost, insulation should make a home more thermally efficient, meaning it stays warmer in winter and you don’t have to put your heating on as frequently.
Signs of an Issue With A Home’s Insulation System
Part of the insulation aftercare involves being able to spot signs of a potential issue with the insulation. Here are some signs that the insulation isn’t working as it should be.
Ineffective thermal regulation
The main purpose of insulation is to stop heat from escaping and keep the house warm, reducing the need for using central heating or electric heaters. If after a few months of installation a homeowner doesn’t notice any difference in the temperature of their home, or the difference suddenly changes, it could point to the insulation being damaged in some way.
Noise transfer
Some types of insulation also offer acoustic insulation properties, meaning they block or at least muffle external noise. If a homeowner found their noise was adequately blocked when the insulation was first installed, but they can now hear the neighbour’s dog crystal clear, it’s a sign of a problem with the insulation.
Presence of pests
Noticing animal droppings or even critters themselves in the space where your insulation lives likely means a pest, such as a rodent or an insect, has decided to make your insulation their new home.
Frozen pipes
Water pipes should be insulated, especially if they’re on an exterior wall. If the homeowner believes their pipes have been insulated but they’re frozen or have burst, this indicates an issue with the insulation.
Air leakage
The presence of air leakage or draughts is another sign that a home’s insulation isn’t performing as it should. Air leakage can happen for multiple reasons, but it’s most commonly a result of gaps in the insulation or insulation that has compressed or cracked over time.
If the homeowner feels a draught coming from an area of their home, this likely points to some level of air leakage.
Unusual colours or stains on the wall
When insulation hasn’t been working for a while, it can cause damp issues, which sometimes show up as discoloured patches on the wall. If you see stains on the wall or ceiling near where there is insulation installed, the area should be inspected.
High energy bills
One of the biggest advantages of insulation is that it keeps energy bills low, so if the homeowner notices that their energy bills are unusually high (and not as a result of external economic factors), it could point to the insulation not being as effective as it should be.
Whether the insulation needs repairing or replacing entirely will become clear upon further inspection.
Damp and Insulation: The Link
Insulation rarely directly causes damp for no reason (although it is possible with the wrong material or incorrect installation), but damp is a key concern to be aware of when installing insulation.
Over time, excessive condensation without adequate ventilation leads to damp, which causes mould, mildew and other issues that are harmful to human health. Insulation should never be installed in an area where damp already exists as a solution – instead, the damp issue must be resolved before any insulation is added.
The relationship between insulation and damp isn’t always clear-cut. For the most part, insulation keeps a house warmer, and this includes the interior of walls. Condensation is less likely to occur on a warm surface, so insulating a whole property reduces the risk of damp.
The problem comes when insulation is only fitted in one or a few places, and condensation is found on uninsulated parts of the property. Imagine a gap in insulation at the top of a wall, or windows that are only single glazed while the walls and ceiling are insulated.
Often when homeowners experience damp in an area of insulation, the insulation is simply exposing a problem that was already there, such as leaking water which now shows up on the insulation.
If a new damp problem has occurred since the insulation has been installed, it doesn’t necessarily mean it’s come as a result of the installation. Other potential issues that could be at play include blocked or damaged gutters or downpipes, missing roof slates, faulty doors or windows, obstruction to air bricks, or leaks in the plumbing.
There are plenty of ways in which a homeowner can reduce the general level of moisture in the air at their property, such as drying clothes outdoors or in a tumble dryer instead of indoors, using an extractor fan, and opening windows when cooking.
If damp is identified some time after the insulation has been installed, do your best to establish where the damp is coming from. If it’s the insulation itself causing the damp because it’s not been correctly installed, remove and refit it. It’s also worth considering accessories like vapour control membranes to reduce the possibility of damp in the first place.
How Long Should Insulation Last?
Most types of insulation promise a decent level of longevity, with the Energy Savings Trust asserting that most insulation has a 40-year lifespan. In some cases, insulation can last even longer, but it must be well-maintained and checked regularly.
While reports of insulation lasting for up to 100 years exist, the insulation would have to be exceptionally well-kept. At minimum, you can expect insulation to last for 25 years provided there’s no serious damage. After 25 years or so, homeowners may want to look at replacing their insulation.
How to Repair Simple Insulation Issues
If you’re called out to fix insulation issues as a form of aftercare, here are some of the most common ones you’re likely to encounter and how to approach them.
Damp
If you encounter damp in a space where insulation is installed, it’s first crucial to establish where the damp is coming from. If there’s a leak in pipes or guttering, for example, that issue will need to be seen to immediately.
If there’s no immediate clue as to where the damp is coming from, check that the insulation isn’t blocking off any ventilation. If there’s inadequate ventilation in the space it will become a breeding ground for moisture and mould, so installing a space for ventilation is a must.
If you’re called out to a home where the insulation needs extra ventilation, you can adjust the insulation (with adequate protective equipment, of course).
You’ll need to climb to the soffit vents with the ladder and check inside. Remove any loose insulation from the vents and cut away any excess insulation around the vent until there’s a wide enough gap for the air to move through freely.
Once you’ve replaced the vent cover, work on ensuring the vent isn’t covered again by insulation. You can do this by using things like plywood strips to keep the insulation away from vents.
Air leaks
An air leak is as it sounds – air is making its way into the property through gaps in the insulation. In these instances, the gap will need to be sealed off.
If there are large air cracks around the home, opt for a foam sealant. These expand to fill the space and tend to be airtight, so there’s little chance of more gaps occurring. If there are air leaks around windows and doors, try weatherstrips. They’re cheap, easily accessible and easy to fit to stop draughts from entering through gaps in doors and windows.
Just make sure you don’t seal off any ventilation in the process!
Risk to light fixtures
Occasionally, insulation has been installed too closely to light fixtures in the loft, which runs the risk of the lights becoming hot and damaging the insulation.
To prevent this from happening, use a knife to cut the insulation away from the fixture. Make sure you leave a suitable distance between the two to prevent the risk from returning.
Does the Insulation Need Repairing or Replacing?
When encountering insulation that’s damaged or simply not in tip-top condition, it can be difficult to know whether to replace the insulation entirely or simply repair it. It mainly depends on what state the insulation is in, its age, and any other external factors impacting its effectiveness.
If you find that the insulation is damaged and it’s more than 25 years old, it’s probably time to look at replacing it anyway. Other situations in which it needs to be replaced include pests having made nests in the insulation and damp caused by leaks or a large volume of water.
This doesn’t mean that insulation automatically needs replacing after 25 years. If the material isn’t squashed, is dry, and is free of dirt, dust, and debris, you’ll probably find that it will carry on working effectively.
Likewise, insulation needs repairing not replacing in incidents of air leaks or when the insulation’s installation simply needs slightly adjusting or stapling into a different position. In some cases, you may just need to add more insulation to the existing patch to make it more effective.
Tips for Homeowners With Insulation
Once you’ve completed the installation, the insulation is in the customer’s hands to look after. This doesn’t mean that you’ve done your job, though. Giving the customer advice on how to get the best out of their insulation is a must and increases your chance of a positive review and happy feedback at the end of it all.
If annual insulation checks are a service you provide, make sure to offer them to your customer, to give them the best chance possible at enjoying longevity from their insulation. Otherwise, provide them with the following tips on getting the best out of their insulation in the long term. In fact, when properly looked after, insulation can last for up to 100 years.
1. Check your home for leaks
While many types of insulation are water-resistant, most insulation materials will still be damaged in some way by moisture or water entering them. Tell your clients to check the the area around their insulation at least once every six months to check for potential leaks and prevent the situation from becoming more serious.
Homeowners should stay alert for signs of high humidity in the home as these can also disrupt and damage your insulation. These include condensation on the windows or walls and mould and mildew problems. Using a dehumidifier and taking the usual steps to bring down moisture in the air (not drying clothes inside, etc) tends to do the trick.
2. Avoid physical damage
Any time a homeowner exerts excessive weight on their loft, they risk damaging the insulation in the joists. Too much gravity on ceilings and crawl spaces can cause insulation to sag and reduces its lifespan.
Once insulation has started to sag it no longer works as effectively and leaves air gaps that put the property at risk of mould and draughts (defeating the object of the insulation in the first place).
Physically damaging, saggy insulation can either be stapled back into place or, if that’s not possible, it will need replacing entirely.
3. Remove dust and dirt
Insulation that gets dusty and dirty over time can become ineffective. Tell your clients that inspecting their insulation at least once every six months is a simple way to keep on top of things. If they do spot a section of the insulation that seems particularly dirty, the build-up of grime could be coming from an air leak that’s been blowing dust and dirt into the space.
Before cleaning up or replacing the insulation, find the leak and close the gap. Otherwise, the problem will simply repeat.
Dirt can also be a sign of insulation that’s harbouring debris from pests or even mould. This is increasingly likely to be the case if the insulation is old. Unfortunately, large sections of insulation in this state aren’t likely to be salvaged – they’ll need to be replaced.
4. Check the insulation regularly
This goes without saying, but the easiest way of checking insulation is still in good condition and doesn’t need repairing or replacing is to check it by eye. If your customers aren’t sure what to look out for to check the insulation is as it should be, offer them advice, or offer an annual service yourself.
5. Minimise the risk of pests
There are plenty of pests that enjoy making a nest in insulation, including termites, mice, rats, and squirrels. Even birds have been known to either make a nest in the insulation or tear off pieces to take back to their own nests. While doing so, they cause some serious damage to the insulation and introduce unwanted substances such as moisture and soil.
Pests finding insulation and using it as a habitat is seriously bad news for the health of the insulation and its ability to effectively keep a house thermally regulated. Once a home has an infestation, the insulation will need ripping out and replacing.
Protecting insulation from pests involves sealing up any gaps near the insulation that pests could use to enter the home.
6. Keep the space free from clutter
Where possible, the homeowner should remove as many items from their space as possible. The more items stored in an insulated loft, the lower the potential for adequate ventilation. Plus, unnecessary weight and pressure on the loft floor can cause damage to their insulation.
 Support for Installers
Let’s say the worst comes to worst and a previous customer is unhappy with the insulation you’ve installed on their property. You should avoid any legal proceedings at all costs, so the first step would be to visit the property and see if you can repair the damaged insulation yourself. The tips above can help with this.
Providing customers with a guarantee can give them peace of mind while also legitimising your operations, so where possible, provide some sort of guarantee with every installation.
Being part of a trade body or accreditation scheme can also help to keep your standards high and improve trust with potential customers.
It All Starts With Effective Installation
Part of the puzzle for successful long-term insulation begins with the installation process. If you choose the wrong material for the property in question or don’t install it properly, you leave yourself open to a call from your client in a year’s time informing you that the insulation is no longer effective, meaning disaster for your business.
To remove the risk of ineffective insulation, working with the right supplier is a must. Luckily, here at SIG, we’re Ireland’s premier distributor of insulation and we work with some of the biggest names in the business to bring you high-quality insulating materials from the likes of Knauf and Rockwool.
Plus, our Technical Building Solutions team and Insulation experts know everything there is to know about insulation and can provide free advice on your project and training on the latest insulation product updates and innovations. There’s no query too big or complex for them to help you with. For an insulation fitting process that’s as smooth as possible, check out our options to find out how we can support you on your next installation.